

Learning how to organize kitchen drawers is not about buying a prettier organizer. It is about giving every drawer one job, and then making that job easy to keep. A drawer that holds everything holds nothing well — the cutlery tangles with the gadgets, the lids hide under the baking trays, and every time you open it you dig. A drawer with one job practically organizes itself: you open it, you see what you need, you close it.
This guide is built for small and rented kitchens, where the drawers are few, shallow or oddly sized, and drilling is not an option. No new furniture, no renovation. One afternoon, one drawer at a time.
The rule first: one drawer, one job
Before you touch a single utensil, decide what each drawer is for. A kitchen drawer works when everything inside it is used in the same place, for the same kind of task. Cutlery and serving spoons belong together because you reach for them at the table. Cooking utensils belong together because you reach for them at the stove.
That is the first principle of how to organize kitchen drawers: the job decides the place, not the other way round. Most small kitchens need only four or five jobs: everyday cutlery, cooking utensils, baking and measuring, food storage (lids, wraps, bags), and the odds and ends every home has. If you have fewer drawers than jobs, combine the two smallest — baking with measuring, for example — and never combine two big ones. Two big jobs in one drawer is how a drawer becomes a junk drawer.
The test is simple: stand where you use the things, and reach. If the drawer you would naturally reach for is not the drawer the things live in, the job is in the wrong place. Move the job, not the habit — habits win every time.
Step 1: empty the drawer completely
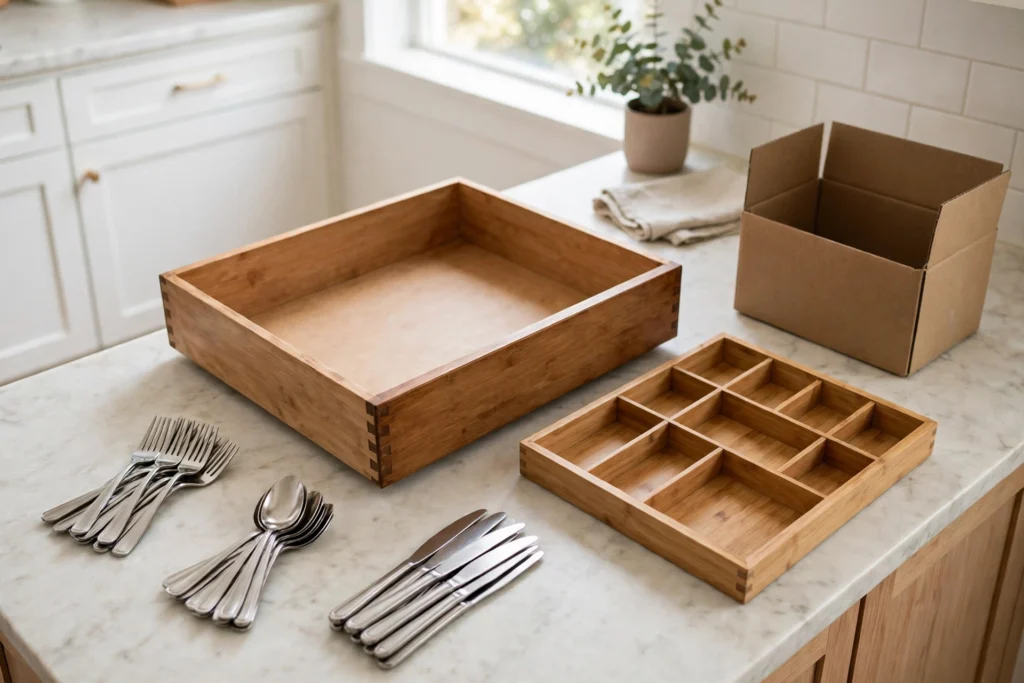
Do not organize a drawer while things are still in it. Take everything out, all of it, and put it on the counter. Wipe the drawer out — crumbs, dust, the sticky ring from a spice jar that leaked months ago. An empty drawer is the only honest starting point, because it forces you to decide about every single object instead of organizing around the ones you forgot were there.
Sorting in place just rearranges the mess. Emptying it makes the mess visible, and visible mess is much easier to be honest about. Work one drawer at a time: empty it, sort it, put it back — then move on.
Step 2: sort into keep, move, let go
With everything on the counter, sort it into three piles. Be quick and be honest — a drawer sort should take minutes, not an afternoon of deliberating over a melon baller.
Keep — it belongs in this drawer. You use it at least once a month, and you use it for this drawer’s job. The everyday forks, the spatula you reach for every morning, the measuring spoons.
Move — it belongs somewhere else. The screwdriver that wandered in from the junk drawer. The spare batteries. The birthday candles that live with the baking things, not the cooking things.
Let go — it does not earn its place. The third vegetable peeler. The garlic press you have not used in a year. Duplicates go first, then the things you keep “just in case” but have never actually reached for. A small kitchen cannot afford just-in-case storage. If you hesitate over something, ask one question: have I used this in the last three months? If not, it goes in the let-go pile.
Step 3: zone by where you use things
Now put things back — but not where they were. Put them where your hands already go. This is the core of how to organize kitchen drawers so the system holds: group by the moment you reach for things, not by what they look like.
The cooking zone is the drawer nearest the stove: spatulas, tongs, ladles, the wooden spoon. Everything you grab while something is on the heat, the most-used tool nearest the front.
The prep zone is the drawer nearest the counter where you chop and mix: knives (in a block or a tray, never loose), peelers, measuring cups and spoons.
The serving zone is the drawer nearest the table: everyday cutlery, serving spoons, napkins, the trivets.
The storage zone is the drawer for lids, wraps, bags and clips — the things that tangle. Lids stand upright in a divider, never stacked flat. Wraps go in a row, not a pile.
Zone by use, not by type. A serving spoon and a measuring spoon are used in different places at different times, so they live in different drawers — and the drawer starts to feel obvious.
Step 4: measure first, then buy dividers
This is where most drawer projects go wrong: the dividers get bought before the drawer gets measured. Buy nothing until you know the drawer’s inside width, depth and height — the inside, not the outside, and at the back as well as the front, because drawers are rarely perfectly square.
Spring-loaded dividers are the rental-friendly answer for most drawers: they press against the sides, need no screws, and come out cleanly when you move. Bamboo trays work for cutlery drawers — measure the width and buy the tray that fits, not the one you wish fitted. Small boxes and jars handle the odd corners: a ramekin holds the corn cob holders, a small tin holds the bag clips.
Two rules. First, the divider must fit the drawer — a divider that slides around is worse than no divider, because it gives the mess somewhere to hide behind. Second, leave one small empty space in every drawer. A drawer packed to the edges has nowhere for the next thing to go, so the next thing goes on top, and the system is broken by Tuesday. If the budget is zero, small boxes you already own, cut-down cartons, or a mug holding the whisks upright do the same job. The container matters far less than the boundary.
How to organize deep kitchen drawers
Deep drawers are the hardest ones in a small kitchen, because they invite stacking — and a stack is a drawer you have to unpack to use. The question of how to organize deep kitchen drawers has one answer: file things upright, like books on a shelf, instead of laying them flat.
Pots and pans stand on their sides. A vertical divider holds a pan upright, handle up, so you can pull one out without lifting the three on top of it. Stack at most two pans, and only if the bottom one is the one you use least.
Lids file, never stack. Stood upright in a divider, each lid is visible and grabbable. If a lid has no matching pot any more, let it go — orphan lids are the most common thing in a messy deep drawer.
Cutting boards stand in a row. A divider near the front holds them like books, biggest at the back, smallest at the front, the board you use daily at the front where your hand lands first. Baking trays and cooling racks file the same way. One divider turns a deep drawer into a filing cabinet, and a filing cabinet does not need digging.
The principle is the same as the shallow drawers, only taller: one job, things filed so you can see them, nothing stacked more than two deep. If you have to move something to reach something else, the filing is wrong — adjust the dividers, not your patience.

How to organize kitchen drawers when you rent
Renting changes the tools, not the system. You cannot drill, you cannot change the drawer boxes, and you probably cannot make the landlord replace the drawer that sticks.
Nothing permanent. Spring-loaded dividers, bamboo trays, adhesive hooks on the inside of a cabinet door — all of it comes out cleanly. Avoid anything that screws in, and avoid adhesive drawer liner; it tears, leaves residue, and costs deposit money for no benefit. A washable liner that just sits in the drawer does the same job.
Work with the drawers you have. Rental kitchens often have one deep drawer and two shallow ones, or a drawer that is really a false front under the sink. Give the deep drawer the pots, give the shallow ones the cutlery and the wraps, and let the false front be a false front. The small pantry restock system uses the same logic for a tiny pantry — zones that match the space, not the space you wish you had.
The one-drawer rule still applies. One drawer, one job — even more so when you only have three drawers. If a job does not fit, shrink the job (fewer gadgets, not a bigger drawer) rather than letting two jobs share.
The habit that keeps it tidy
An organized drawer is not a finished project; it is a system with a maintenance habit, and the habit is small: one minute, once a day, at the moment you are already in the kitchen.
When you put the clean dishes away, put them in their places — not on top of the drawer, not “for now” in the wrong drawer. When you notice something has drifted, move it back the moment you see it. Drift is cheap to fix when it is one item and expensive when it is a drawerful.
Once a month, do a two-minute check: open each drawer, pull out anything that does not belong, and put it where it belongs. It is the same logic as the small-spaces system — small, regular resets beat big, rare overhauls. And keep the one-in, one-out rule for gadgets: a new peeler means an old peeler leaves. Kitchen drawers do not get messy because people are messy; they get messy because things arrive and nothing leaves.
What about the awkward stuff?
Every kitchen has the things that fit nowhere: the junk drawer, the plastic containers, the lids with no pots.
The junk drawer is allowed — one of them. Every home needs a place for the batteries, the tape, the spare keys. The rule is that it is one drawer, and it gets the same treatment: emptied, sorted, divided, with a boundary. A junk drawer with dividers is a utility drawer. A junk drawer without them is a black hole.
Plastic containers: lids on, or not at all. The container graveyard is almost always a lid problem, not a container problem. Keep only the containers whose lids you can find right now, nest the containers, and file the lids upright in a divider. If a container has no lid, it is not a container — it is a bowl, and it belongs with the bowls.
The seasonal things do not live in the drawers. The turkey roaster, the ice-cream maker, the fondue set — these live on a high shelf or in a cupboard, not in the drawer you open daily. Drawers are for daily and weekly things. If you are cooking for a crowd soon, the Thanksgiving kitchen pantry prep guide shows the same zone-by-use thinking applied to the pantry before a big cooking day — the drawers and the pantry work as one system, not two.
Start with one drawer
You do not need a free weekend. You need one drawer, one hour, and the willingness to let a few things go. If you have been putting off learning how to organize kitchen drawers because it feels like a weekend project, pick the drawer that annoys you most — usually the cutlery drawer or the one by the stove — and run the steps: empty it, sort it, zone it, measure it, divide it.
That is the whole secret of how to organize kitchen drawers: not a better container, but a clearer job, a visible system, and a one-minute habit that keeps it. Do one drawer today. The rest of the kitchen will follow.
Frequently asked questions
How long does it take to organize kitchen drawers?
One drawer takes about an hour the first time — emptying, sorting and putting back, plus a trip to measure for dividers. A whole small kitchen (three or four drawers) is an afternoon. The second time, it takes twenty minutes, because the decisions are already made.
Do I need to buy drawer dividers?
No — but you do need boundaries. Dividers are the easiest boundary, and spring-loaded ones are cheap and rental-friendly. If the budget is zero, small boxes, jars and cut-down cartons do the same job. What does not work is no boundary at all: without something separating the zones, everything drifts back into a pile within a week.
How do I keep kitchen drawers organized with kids in the house?
Give the kids one drawer of their own — the low drawer with the plastic cups, the lunchboxes, the snack containers. Children keep a drawer tidy when it is theirs and the system is visible. Keep the sharp things in a high drawer or a latched one, not in a drawer a child can reach.
What is the best way to organize deep kitchen drawers?
File things upright instead of stacking them: pots on their sides, lids and cutting boards stood in a row with vertical dividers, baking trays filed like books. Nothing stacked more than two deep. If you have to move something to reach something else, the filing needs adjusting — the system, not your patience, is the problem.
Is there a printable checklist for this?
There is no kitchen-drawer printable yet. The Printable Library holds the free printables that do exist — the small pantry checklist, the 10-minute nightly reset, and the small closet worksheet — and it is where a kitchen-drawer checklist would appear if one is made. Until then, the steps in this guide are the checklist: empty, sort, zone, measure, divide, maintain.


1 thought on “How to Organize Kitchen Drawers”